Getting the hang of the EV3

Now I have spent many hours playing with the NXT and using it in class, but I have just received a class set of 15 EV3 Mindstorms kits, I have a lot of tinkering and testing to do before I get down to the planning for implementing them within my class program for the Year 5 and 6 students. First step was to unpack, which with that many kits is long and labour intensive, but with the reward of getting to build, test and play with the new kits at the end it was not so bad.

My one dislike with the NXT was the need to plug in the robot through a USB cable to download the program, but the Lego Education Department have come up with a fantastic app that now allows you to send your program through Bluetooth to the bot and you are able to stop the program instantly over distance from the iPad, which I have found allows for a greater scope with trial and error when writing a program as you no longer need to run, pick up the robot when you have made a mistake and can quickly EV3and seamlessly edit your program on the fly – no USB connection is needed for each mistake, which should be a great bonus in the classroom. Additionally, connecting through Bluetooth was quick and easy and it is simple to rename each of the control bricks, so when there is a class going on there should not be too much problems with students connecting to their brick rather than a classmates.

With younger students the app seems like it is going to make the process so muchEV3 - 3 simpler for getting students achieving instant success. The blocks are colour coded, arranged in 4 separate folders depending on their function and the drag and drop nature of the iPad is perfect for when you are testing and editing a program. Additionally, the app has two entry points, either a work space for creating programs or a set of tutorials that have videos and links to external references. If you add the fact that all the apps are free for Andriod or iPad you know that you are onto a winner.

Now the next step is to spend the weekend playing and testing, reading blogs and watching tutorials then I need to work out if it is 2 classes at a time with one between 3 students or one class at a time with 1 between 1 students. Oh, and how am I going to store them all?

KS2 Robotics Club – Surprisingly Successful

It is funny what a bit of success, a few years practice and some more resources can do to the way an after school club is run. I have talked about this previously, but this year is different as my robotics group is much younger (KS3 – Year 3,4&5 or Grade 2,3&4). The groups is right on the cusp of being too big for one teacher at 16 students, but I think that I have carefully managed and planned the sessions so that it will run a lot smoother than when I had teenagers last term.

The big difference is that I have carefully purchased resources from my budgets to build upon what we have and to provide different levels of differentiation and challenge for each student.
Very Beginner – Bee Bots
These are a great resource to introduce programming, quite cheap and can still be used with older kids to get the idea of simple programs.
Novice – Lego Simple Machines Kits So simple, but the best way to show kids how gears work together to make movement happen and gets them following a set of what can be difficult instructions.
Intermediate – WeDoBuild it and then program it. It comes with a motor, movement/light sensor and a tilf sensor and simple Scratch like software to program your creation.
Advanced – Mindstorms You only need to look at various youtube videos to see what can be done with a Mindstorms kit and if you throw a few kits together you have amazing possibilities.

Next problem comes when every group has a project completed and wants a computer to use to program the robot… solution? I have no idea just yet!

When you have everything just fall into place

I have taught a Lego Robotics Club for the past year as an after school activity and there have been good times and bad. There have been the great successes and aha moments, but they have been overpowered with lack of space and resources or havingMondstorms - Smiles kids who do not really want to be there.

Today was the beginning of a new session of ASAs and I had a senior student group of 17 kids. I was a bit worried, but I was prepared. I booked my classroom as the venue and made sure that there was enough resources to cover the group -living in China has it’s benefits and Taobao is one of them as I was able to pick up two new NXT Mindstorms sets quickly at a really cheap cost and no importing hassles. I collected a series of inspirational clips from YouTube showing what can be done with Mindstorms and WeDo and off we went.

I must say that it was a huge success and even though I could have used another kit or Makey Makey Pacmantwo it was clear through the engagement of the students that all is good. They were enthusiastic, questioned, worked together and built. When the groups of 3-4 began to look like they were too big I pulled out the Makey Makey kit for its first exposure to the students and they were wowed. Tea light candles became the buttons for Pacman and there was laughter and a whole new round of wows and aha moments. The board in the back ground continuously screened mammoth lego machines in action and there were sighs and cries of ‘Nooo…’ when I informed them it was time to pack up.

Additionally, this was the first time that I had had girls sign up for the club and they Mindstorms - Girls at workwere into it and more focused.

Next week – complete building and begin learning about programming. My main goal is to keep them focused and enthusiastic, but I feel that a few Makey Makey challenges will suit the purpose and do the job.

End result – 17 students developing an interest in Robotics and computer science and one teacher feeling very pleased about how his club went.

Here is their favourite of the motivational clips…

A quick lego hack to save a few dollars

I always like the idea of taking something and hacking it into another and as you may know I am a Lego geek. After playing with lego gears and motors from the WeDo set I cam across the video below and it looked like a pretty fun way to try and create something new for a virtually no price.

Small gearTake a 50cent motor from your electronics resources, a peg to star technic connector, a small gear and a hot glue gun and a AA power source. Glue the peg to the drive shaft of the motor and make sure that it sets straight. Wait five minutes and you have a mIMG_0218otor. Now the motor is very simple and a bit too powerful, but I am sure that with a bit of gearing down you can make it work quite nicely.

It is as good as a store bought motor? No, but it is always a lot more fun and rewarding when you make it yourself.

Watch the video below and give it a go or show your class and let them have a go 🙂

Learning like a Child

When was the last time that you tried to learn something by yourself. I know that when I want to find out something new the first thing I do is google it. I look for a youtube clip or a tutorial or a weblink or anything that is there that has already done the learning that I want and I use it as a starting point.

You see, last week I brought home the Lego WeDo kits and wanted to see how to really Lego Gearsuse it. I have made things with them before and had my students do the same, but we had followed a set of instructions and made what someone else had created. We had made, not created, we had followed a set of instructions, not designed and to me creation and design is the essence of Lego. The instructions are a starting point, but they need to lead to somewhere else to really unlock the joy of Lego. If you give me bricks I will design and build, wheels I will create a car or mini figures and I will animate, but a set of gears, motors and axles and I am at a loss – I have not learned how to use them with independence.

So the kits sat there for a week and I did not interact with them. But, early this morning, IMG_9530while the rest of the house was asleep, I awoke and crept into the lounge. I took the kits to the rug in the middle of the floor and like a child with a new toy I began to explore. Beginning with a motor, axle and a gear I began to build. I became lost within the experience. What I experienced was what I want my students to experience and it took me back to similar experiences as a child.

Slowly my creation began to take form. There was no purpose to my creation other than learning how the gears and wheels and axles fitted together and my only goal was that once I added the motor many different parts would move at different speeds and in different ways and directions. I experienced frustration after frustration then success followed by a failure. The design was built up only to be taken down and modified. When the family surfaced at half seven I realised that I had just been immersed in learning for 2 straight hours of bliss – yes I awoke at 5:15 to play Legos – and when they saw the joy on my face the did not even laugh or tease me.

It took me back to a seminar with Simon Breakspear about design thinking in education. Naturally when a child plays with a toy such asdesign-thinking-fo-educators Lego it is the design model that they are using – the discovery, interpretation, creation, experimentation and evolution. I went through all these steps and although there was not a product in mind there were constant evolutions as I tried to add new components or found a different way of doing things.

How will this change my teaching and use of WeDo and Mindstorms in the class? First let them follow a plan – build something that someone else has designed, let the students come to terms with the way the components fit together and how to code them, but the second exposure will be without any instructions or preconception of what someone else has created. They will test, try, fail, fail, succeed and fail and maybe they will create something new, but they will develop an understanding of what it takes to create. They will be able to take the ideas from the imagination and have the opportunity to express themselves and their thoughts.

What is my next step? Well, I am going to Google. Now that I have my own experiences I am going to look to the ideas of others. I need to research to improve my skill set and understanding just like any good designer would.

What has it taught me? Play. Approach new learning like I did when I was a child. Try new ideas and just try and work out how things work. Keep being inquisitive and take the time to do so. It may not be the easiest way in our world of knowledge at your fingertips, but it is so much more rewarding.

The video is of my creation. It does nothing except for what I set out for it to do – move and allow me to learn about how gears fit together.

Green Screen App

Screen Shot 2015-03-03 at 10.48.23 pmI just downloaded Green Screen App and I am in love. Chroma Key / Green Screen / Blue Screen programs have always been not that good or really expensive, but this is easy to use and will only cost you a few dollars in the App Store.

Here is a quick 20 second video that I made by taping a piece of green paper to the wall and grabbing a bit of Lego. I got the background image from Google and I added the lasers with Gun Movie FX (Another great special effects app).

The interface is really easy to use and you are able to layer three videos/images. Classroom applications are limited only by a students imagination. I can already see students adding themselves to historical footage in a history presentation.

Watch the video, download the app and give it a go 🙂

Lego Sail Challenge

Ok, half day today and only 6 students, as many have already flown away to exoticWind Powered Lego Cars destinations, and only a half day at school.

What to do?

Lego Design Challenge – Make a Wind Powered Car.

Lego Wheels Kit, Tape, Pipe Cleaners, Ice Block Sticks, Paper and a Hair Dryer for the Wind. The variety of designs were amazing and there was whole lot of trial & error and design thinking happening. Sail designs were modified to be curved and more rigid and a natural progression was to add outrigger like wheels to stabilize the vehicle.

It would be great as a design technology component of an renewable resources / environmental inquiry and I would include more research/investigations into sail design and different types of sail boats.

A unique gift

On the last day at HFS a student came to me with a small recycled plastic container and inside it contained a farewell gift.
I am not a big fan if gifts, as I feel honored and a bit embarrassed at the same time. Additionally there is the student who has spent hours on making a card, which is almost as good as my favourite gift the thank you letter, but feels that another kid has ‘won’ because they have given a bought gift. If I could, I would ban gifts, but that is not going to happen, so I will suffer the awkwardness of the end of year and continue being very great full.
Now back to the box, as it was the most unique gift I have ever received ever, was student created, involved a lot of hard work and creativity and was created with me in mind – my very own Lego set designed by this boy with handwritten instructions.
I was honored and gobsmacked.
We sat down together and I built the kit under his guidance. I just have to share it here as it is too cool and is the unique gift to get the geek who has everything.

20130716-202842.jpg

20130716-202901.jpg

Toy Hack – Sharing Understanding through Toys

My initial use of Lego to reflect on my time with Kath.

While still processing my time with Kath Murdoch over the last two days I have jumped on something that I found quite appealing to my geek side and surprise surprise it appealed to the boys and girls in my class.  Using an iPad, toys and a cartooning App to explain understanding.  The App was called Text Here (it really is called Text Here, that is not a cut and paste error), the toy was Lego and the understanding was our playground strategy called W.I.T.S (Walk Away, Ignore, Tell Someone, Say and I Statement).

One thing I did take into account is Guy Claxton’s Split Screen thinking model, which is something that I have taken away from my time with Kath Murdoch. In the Split Screen class the the process is equally as important as the content and skill.  The content being explaining WITS in a Visual way, skills were time management and co-operative and the process revolved around collaboration with their partner, synthesizing their ideas into a very text limited form and then taking a risk when sharing with the rest of the class. Each of these skills and processes were given as much scaffolding and exploration as was the process of using the tool which was the iPad App.

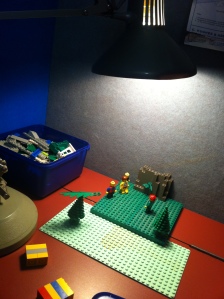
Then I showed them my reflection from Kath’s first day, set up a corner and in pairs I let them free to play and create.

Stage set up in a cave with lamp to set the scene.
WITS - Say an I Statement
WITS – Say an I Statement
WITS - TEll a Teacher.
WITS – TEll a Teacher.

Big thank you to Bart Miller for the Toy Hack title – loving the Hack mentality of turning an items use to a very different purpose.